Hi, ladies and gentlemen.
Today I bring you a Tutorial for Custom Action Figures in general: Gi Joe Customs, Star Wars Customs, Marvel Customs, etc.
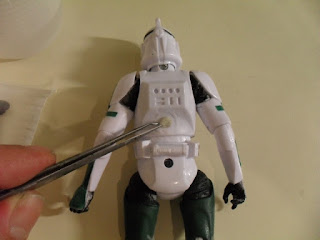
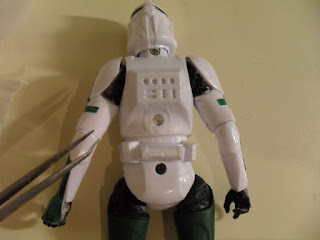
It’s about cover the holes on Action Figures to look more realistic. These holes are generally some entrance for screws.
I developted a simple technique that allows you to reuse the part without damage it, in case you want to disassemble the Custom.
I’m gonna try to show you in the following pics:
(Para ler este Tutorial em Português, clique AQUI)
In the pic above you can see a “fake” Star Wars Clone Trooper “6, from Black Series. On the left of the pic I have a small amount of epoxi clay, below there’s a small amount of cotton.
On the pic above, I soak the cotton in the water, before putting it in one of the holes of the Action Figure.
After soaking the cotton, I remove the excess of water and put in one of the holes.
You must remove the excess of water, or the wet cotton may inflate inside the hole and push the epoxi clay out. The cotton MUSN’T exceed the limit of the hole.
I aplly a small amount of epoxi clay over the hole.
I mold the epoxi clay over the hole slightly with my finger.
After it is already dried, I’ll sand to remove any possible flaws.
Why don’t use the epoxi clay directly in the hole? If you do it, you’ll spend more clay (depending on the size and number of holes, you’ll get a good saving). Furthermore, if you want to disassemble the Action Figure Custom for any reason, it’s just open a small hole with a Dremel (rotary tool) on the place you have apllied the epoxi clay, remove the cotton, unscrew and it’s done. But make a shallow hole, or the drill may reach the screw and damage it.
If you apply the epoxi clay directly on the hole, being with the screw or not, it will be also possible to disassemble the Action Figure, but it will be so much harder to do it and you may damage it.
I hope this short Tutorial may be useful other customizers.


No comments:
Post a Comment
Feel free to let me know your opinion about this custom!
Sinta-se à vontade em dizer o que achou deste custom!